Getting Started
Get Peta Running in 5 Steps
Connect AI agents to MCP tools through a secure gateway — with built-in secret management and approval workflows.
STEP 1
Install & Deploy
Run a single script — it validates your environment, configures ports, and launches all services.
Download deployment script
Download the script for your operating system:
curl -O https://files.peta.io/installation/deploy-peta-mac.shchmod +x deploy-peta-mac.shRun the script
Execute and follow the interactive prompts:
./deploy-peta-mac.shChoose deployment mode
The script prompts for deployment mode: Core + Console (recommended), Core Only, or Console Only.
Deployment complete
On success, you'll see access info:
STEP 2
Configure the Console
Open Console
Open your web browser and navigate to http://localhost:3000
Initialize Vault
Set up your master password through the console setup wizard. This password initializes your vault and secures Owner Token generation.
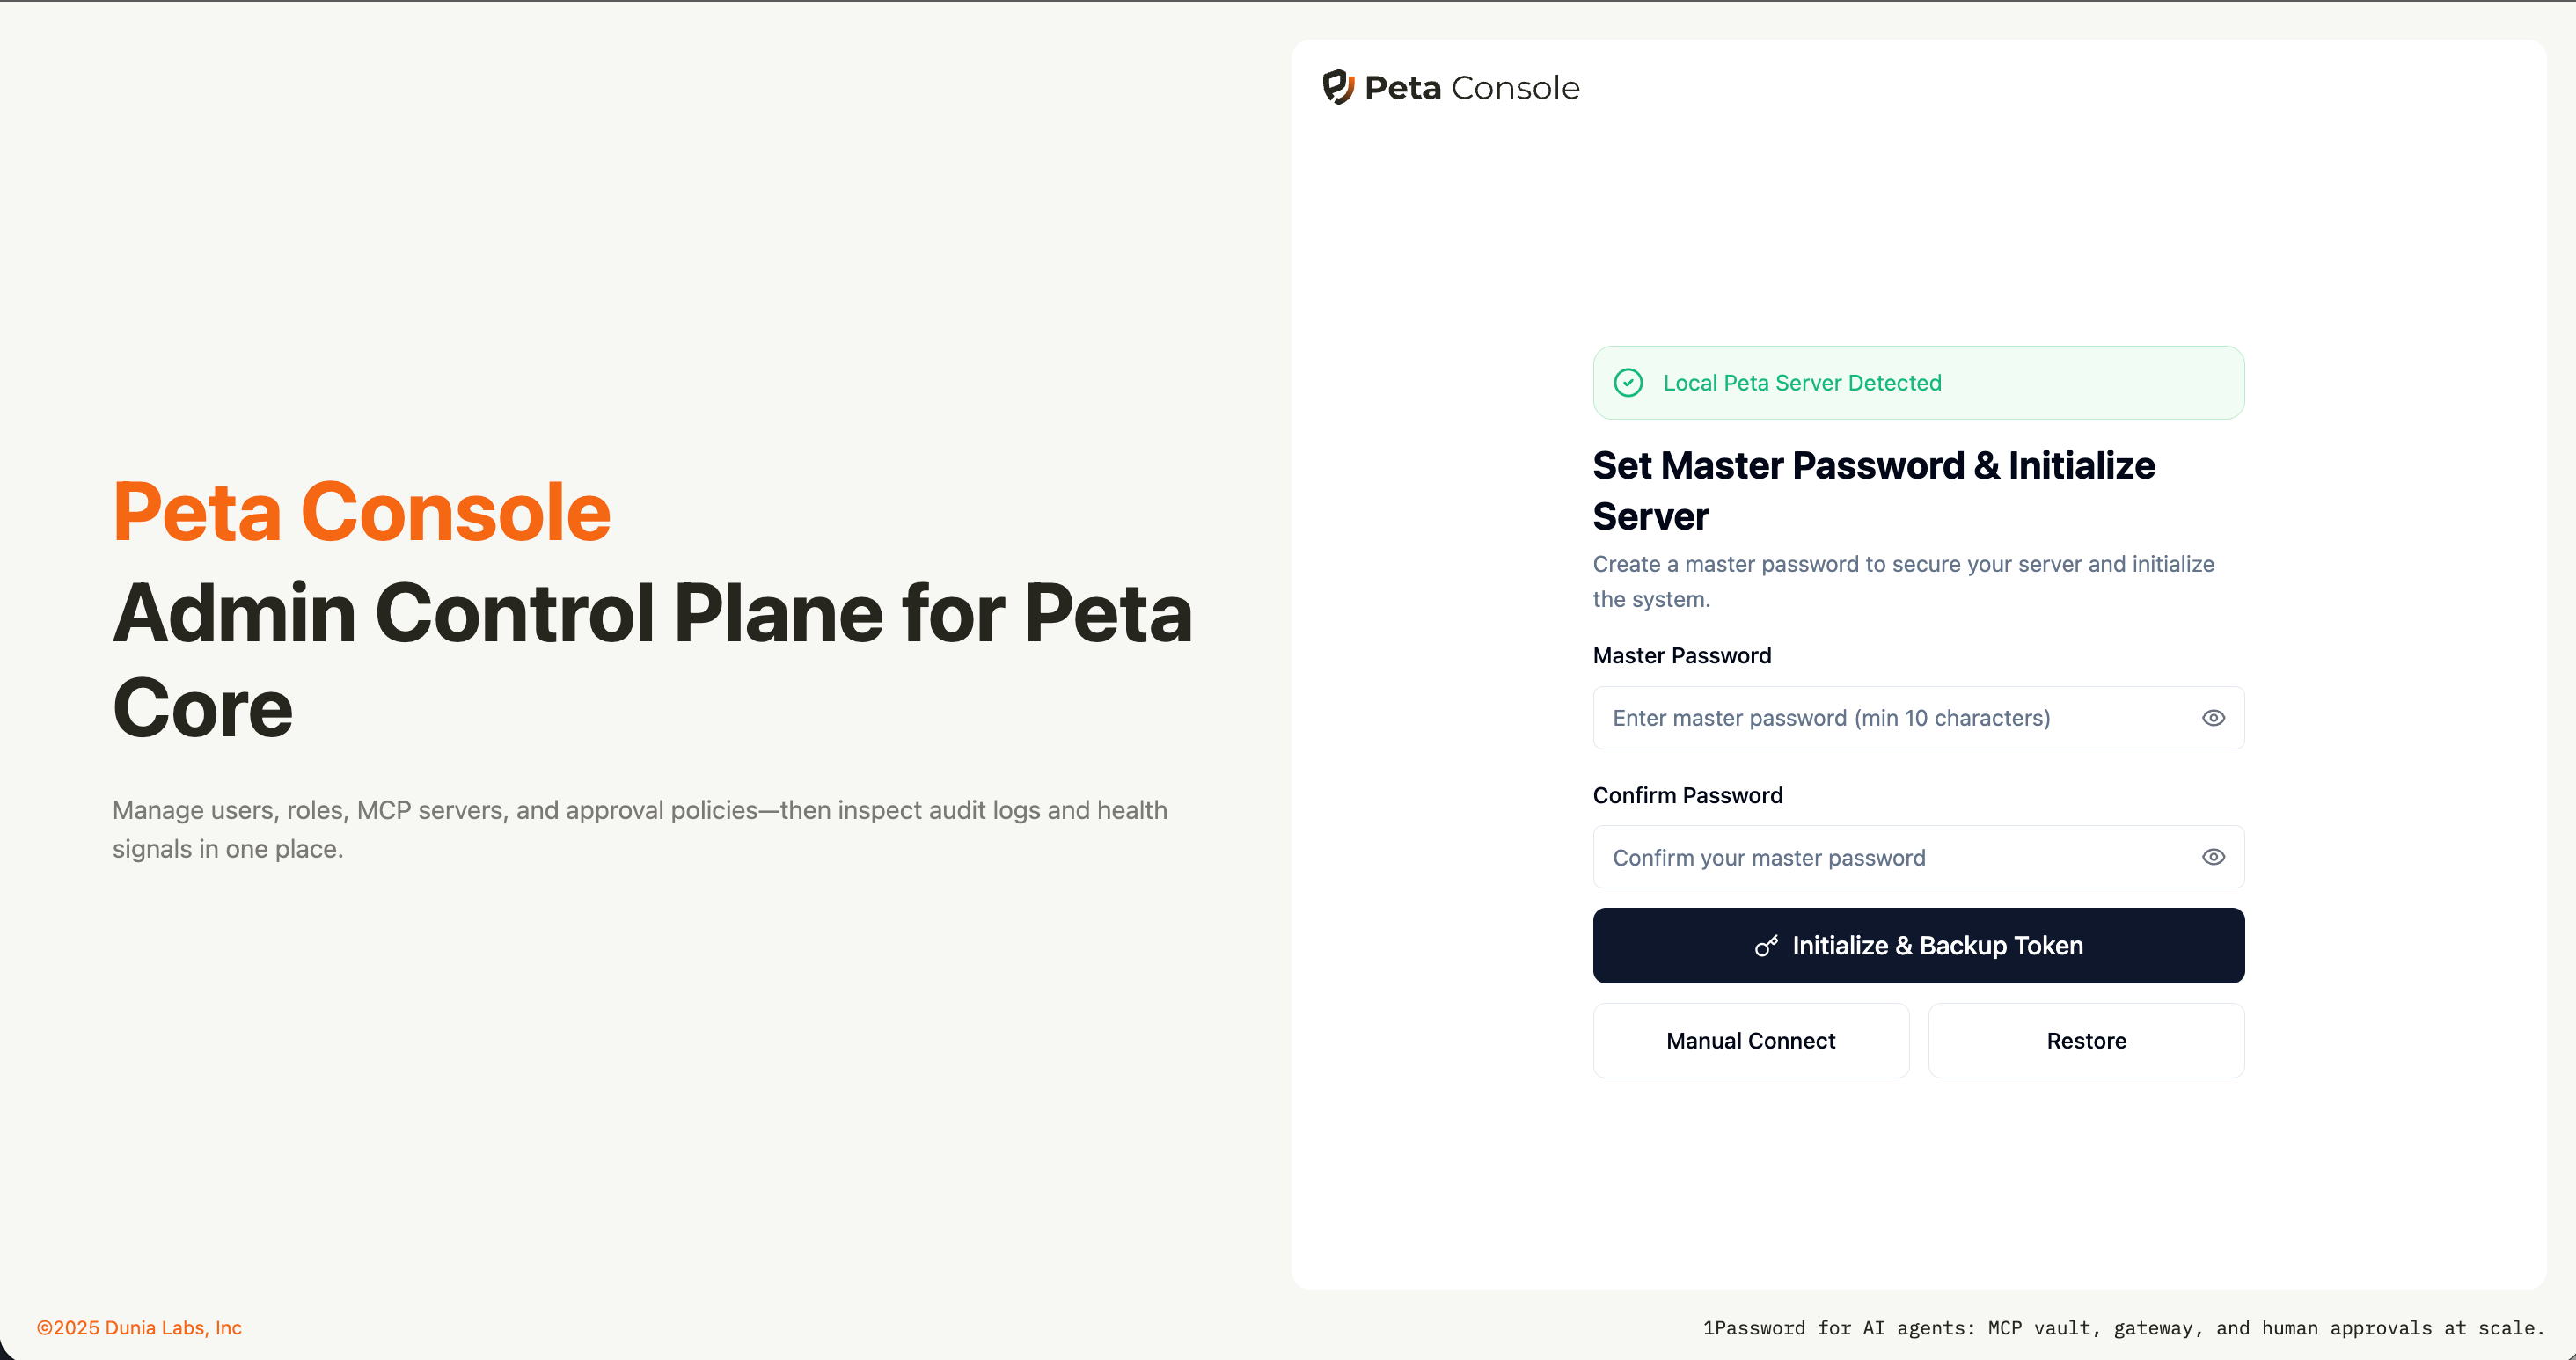
Backup Owner Token (Critical)
Owner Token appears once after initialization. Copy it immediately and store in a secure password manager.
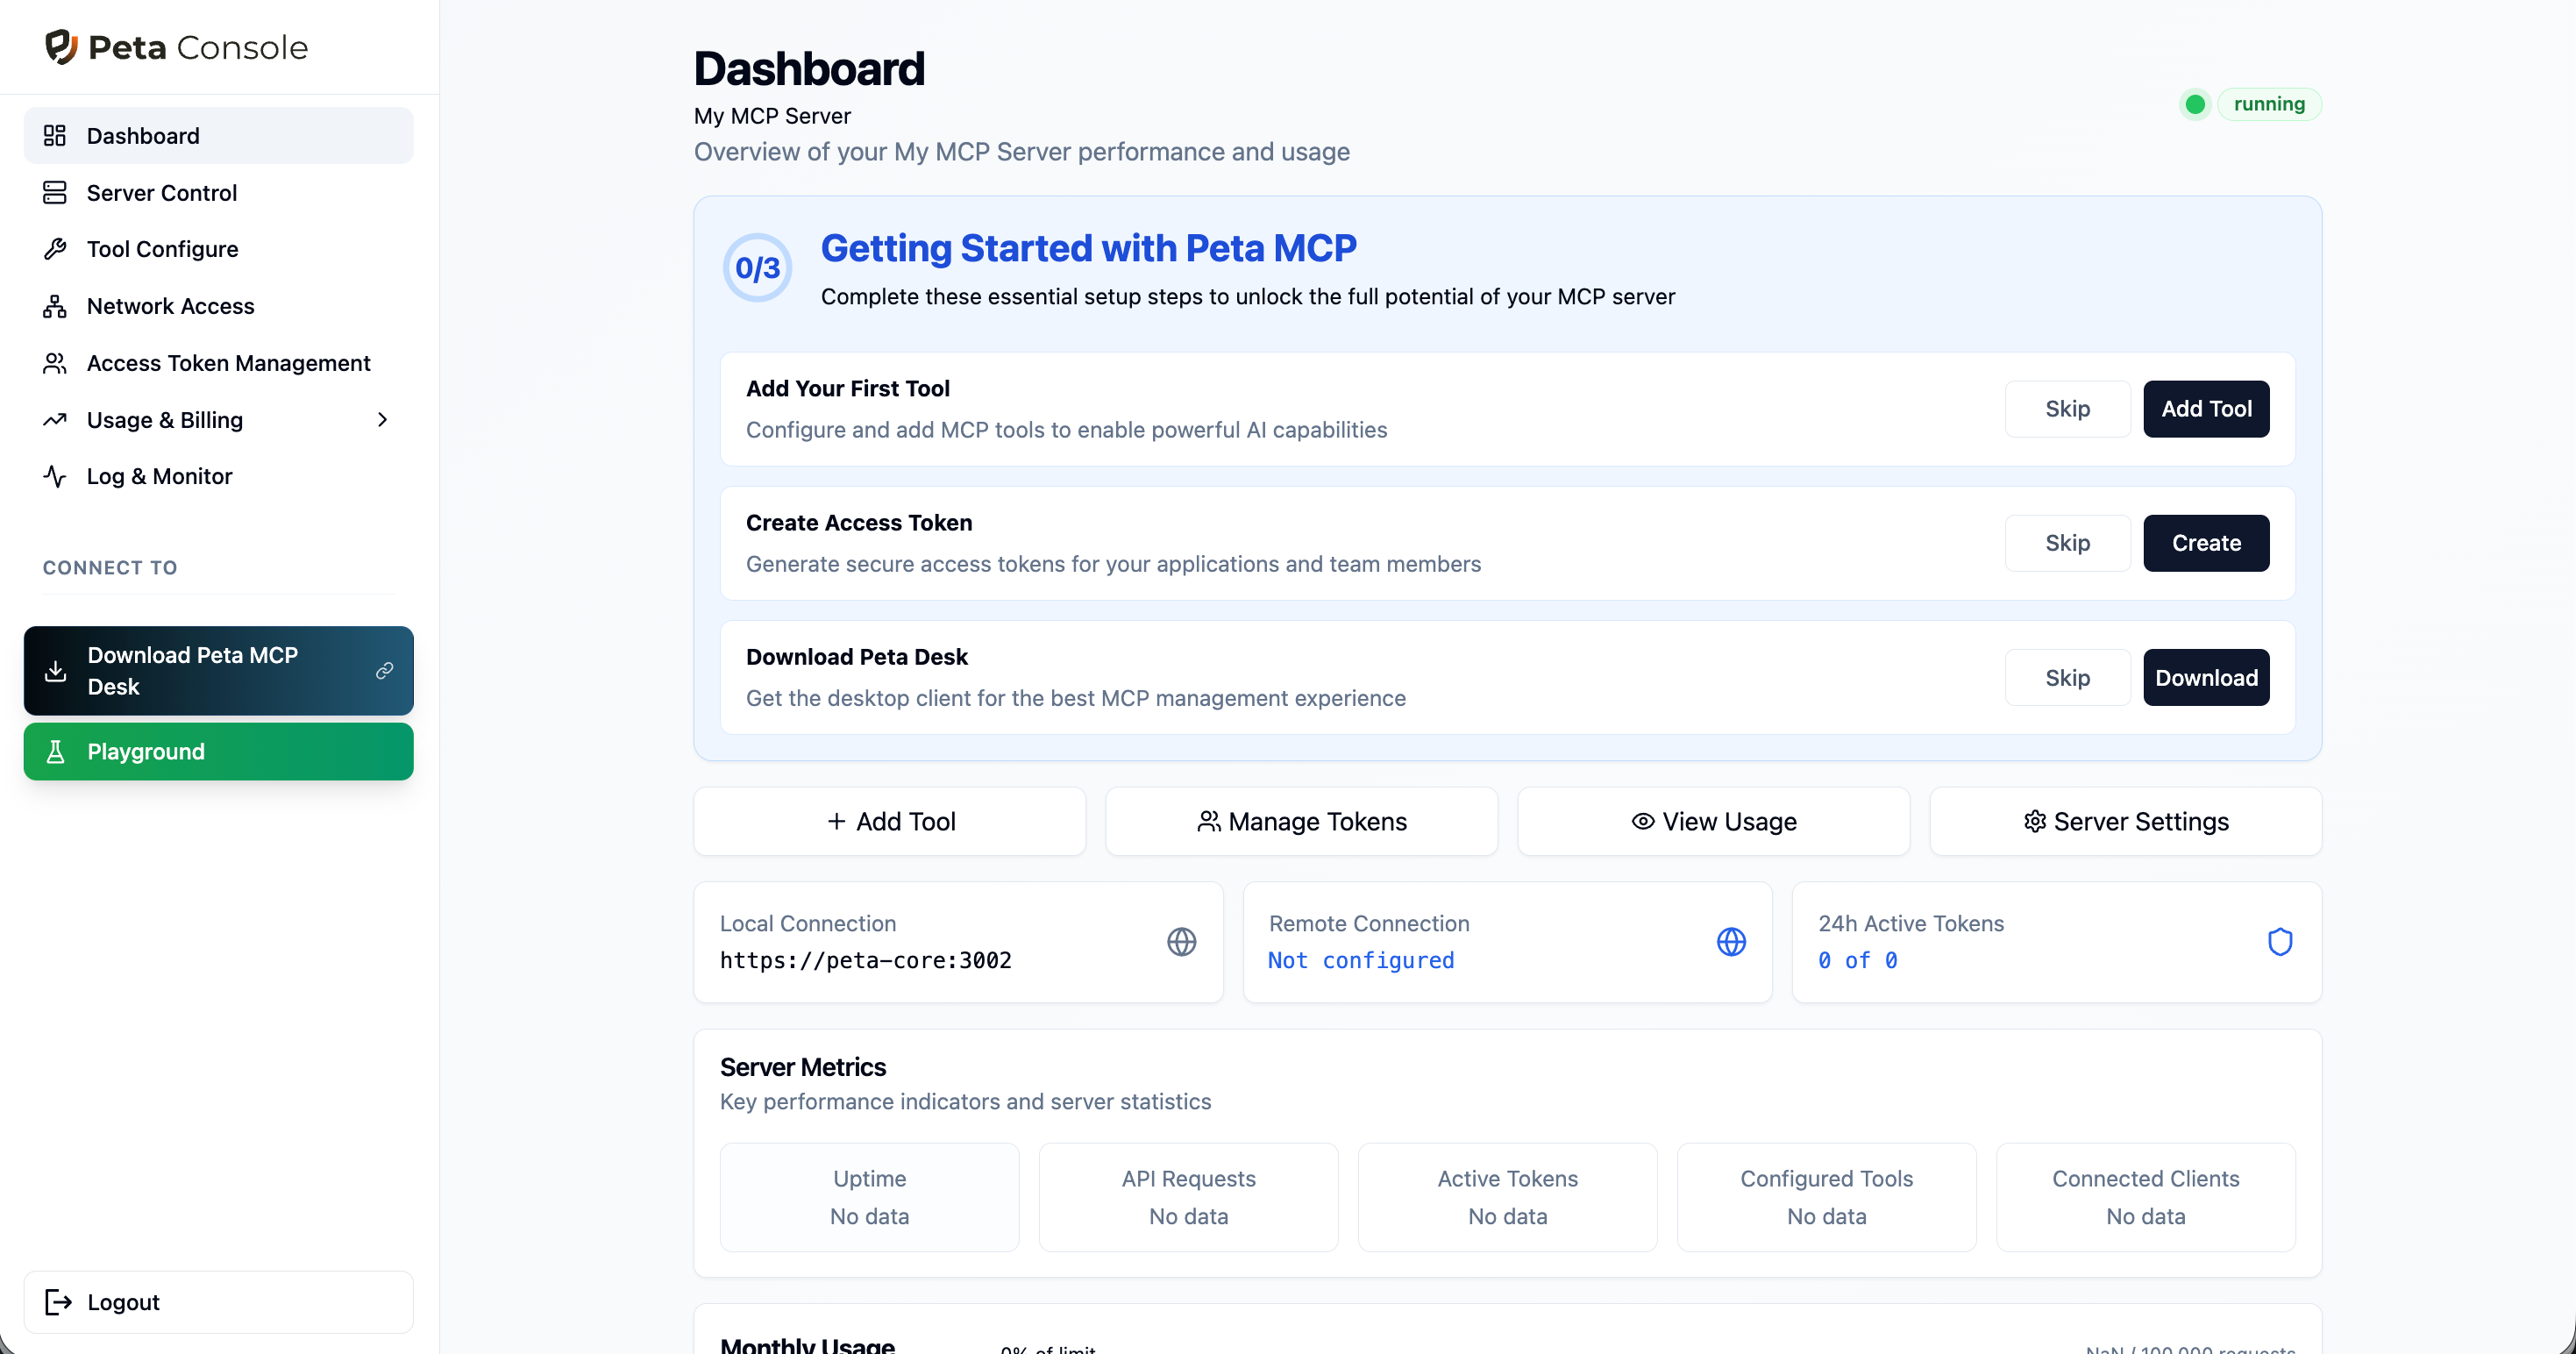
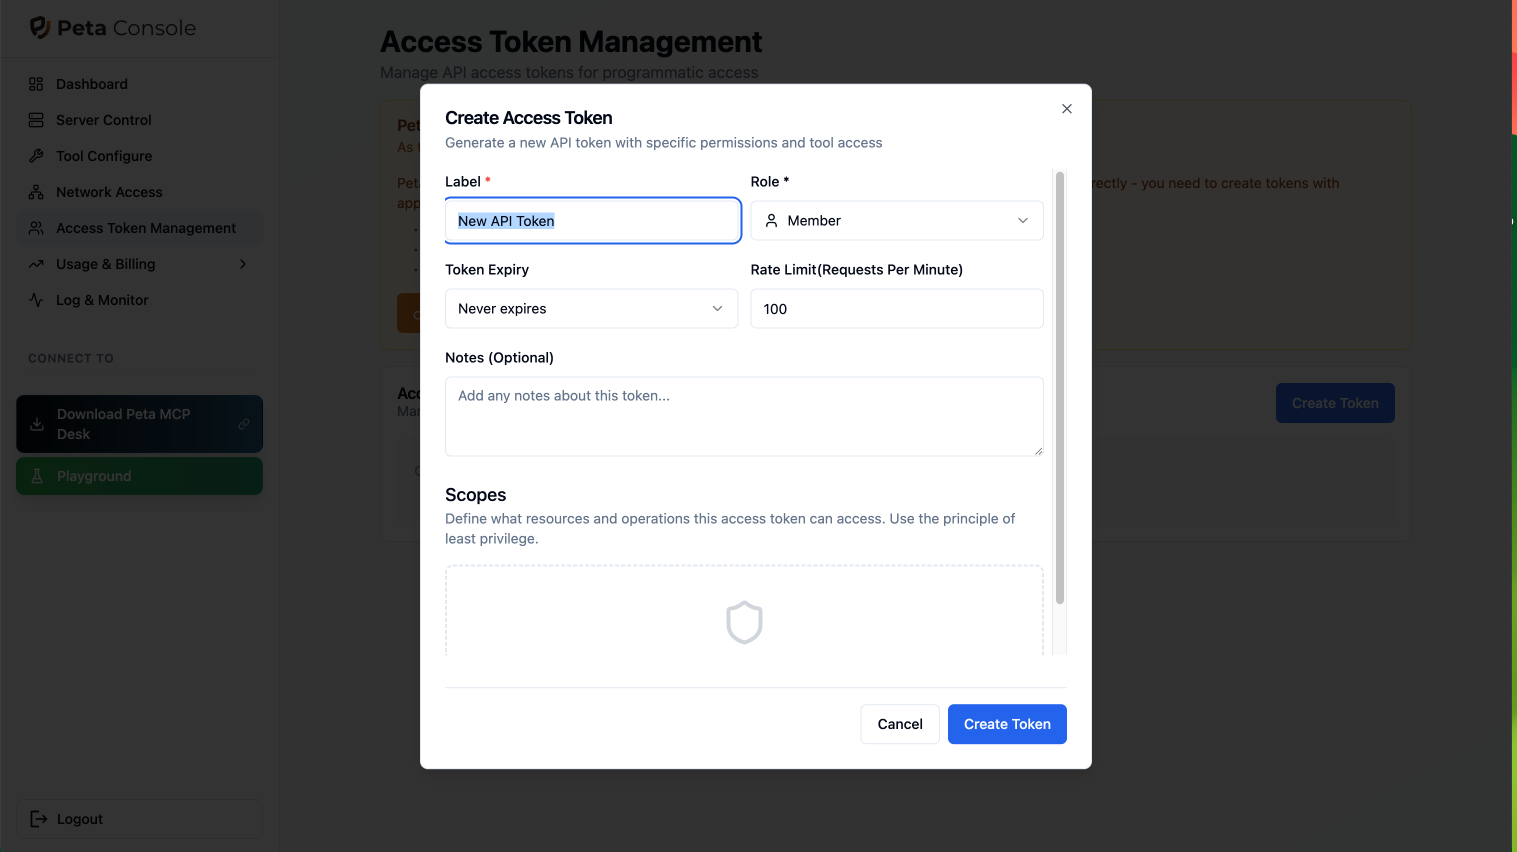
Create Access Token
Generate an Access Token in Console → Access Token Management → Create Token. Keep Owner Token for admin tasks only and use Access Token for daily operations.
STEP 3
Add MCP Tools
Choose how to add MCP tools to your gateway.
Deploy Managed Templates
Pre-built tools (GitHub, Slack, PostgreSQL, etc.) ready to deploy in one click.
Console path: Tool Configuration to Add Tool to Templates
Connect Existing MCP Servers
Point Peta at your existing MCP server URLs and apply access policies.
Console path: Tool Configuration to Add Tool to MCP Server
Wrap REST APIs (No-Code)
Turn any REST API into an MCP tool with a visual mapping interface.
Console path: Tool Configuration to Add Tool to REST API
STEP 4
Configure MCP Client
Add this to your MCP client config (Claude Desktop, Cursor, or any MCP-compatible tool).
Add to your MCP client settings:
{ "mcpServers": { "peta": { "url": "https://your-host:3002/mcp", "headers": { "Authorization": "Bearer <ACCESS_TOKEN>" } } }}url — Your Peta Core endpoint. Use http://localhost:3002/mcp for local setup.
Authorization — The Access Token created in Step 2.4. Use HTTPS host only for remote access.
VERIFY
Check Your Setup
Confirm everything is running correctly.
Check Core health:
curl http://localhost:3002/healthExpected response:
{ "status": "ok" }Open Console in your browser:
http://localhost:3000All set!
If both checks pass, your Peta infrastructure is ready. Open Console at http://localhost:3000 to start managing tools and tokens.
STEP 5
Install Peta Desk (Optional)
For teams that need a desktop GUI to manage MCP connections — or a human-in-the-loop controller for approving sensitive operations. AI agents connect directly via API; skip this step for API-only setups.
When to use: Install for team members who need a visual interface to manage MCP connections, or when you need human approval gates for sensitive operations. AI agents connect via API without Peta Desk.
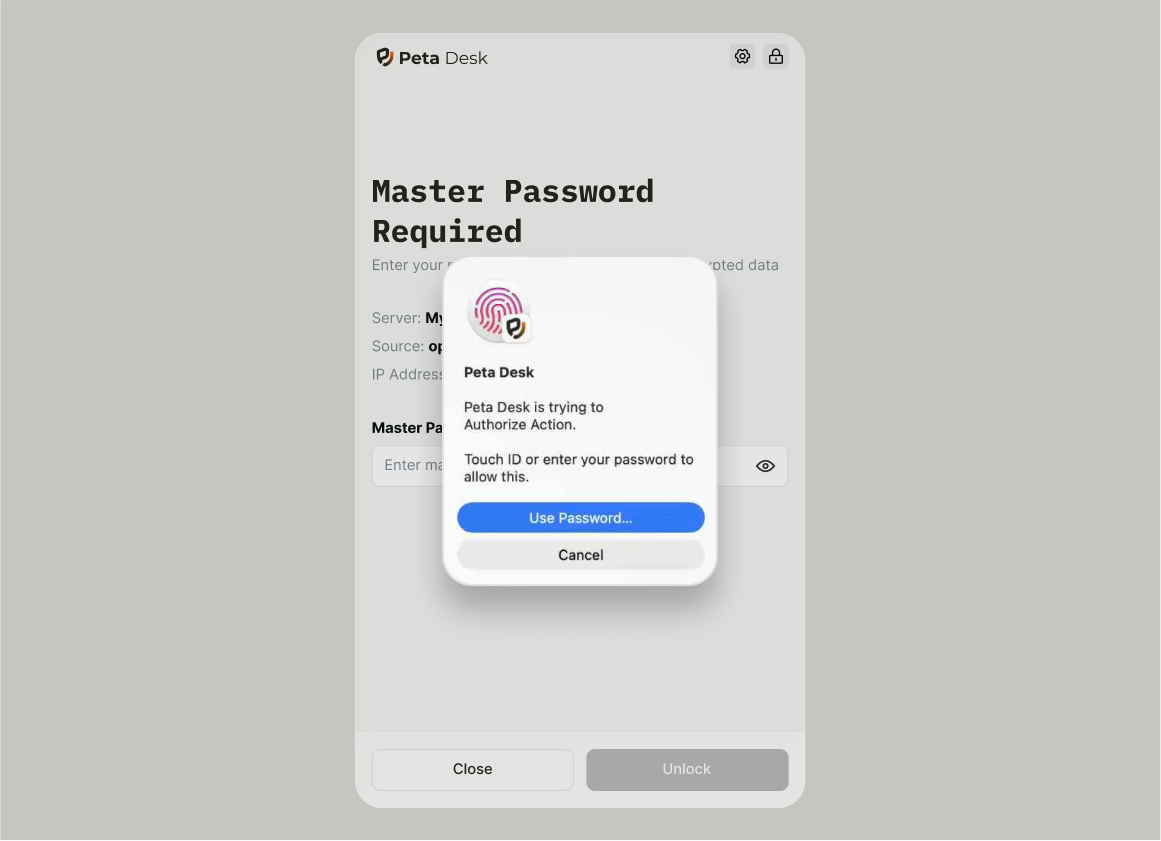
Human-in-the-Loop: Mark specific tool actions as requiring approval — Peta Desk delivers real-time notifications when those actions are triggered by AI agents, letting a human review and approve or reject before execution.
TROUBLESHOOTING
Common Issues
Re-run the deployment script and choose available ports when prompted. Verify assigned ports with docker compose ps in your deployment directory.
NEXT STEPS
What's Next?
Explore Architecture
Understand how Peta's security model protects your infrastructure
View Architecture →Join the Community
Get help, share feedback, and connect with other Peta MCP users